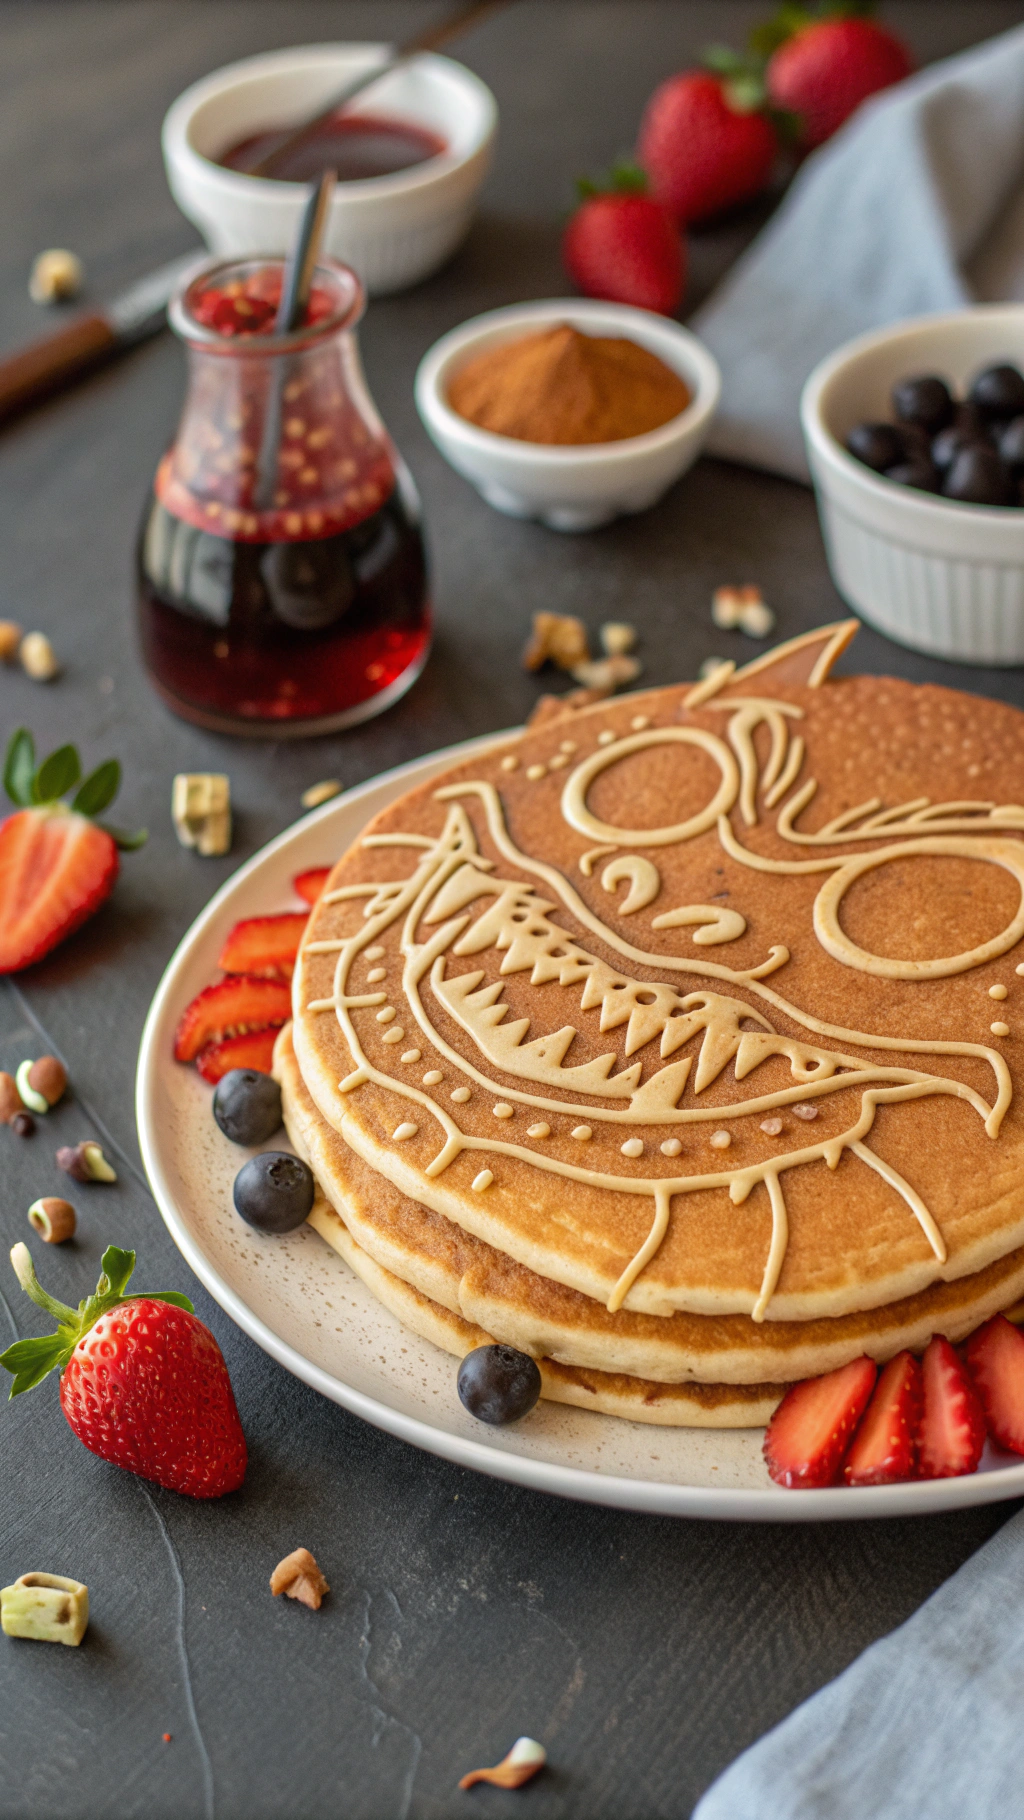
These colorful monster pancakes are part breakfast, part edible art project. With squeeze bottles and gel food coloring, you can turn your weekend mornings into a creative adventure that’s fun for kids and adults alike.
- Prep
- 15 min
- Cook
- 15 min
- Total
- 30 min
- Makes
- 4 servings
I used to think pancake art was for Instagram pros with too much time on their hands. Then I realized I was just scared of making a mess. The truth is, creating epic breakfasts is a superpower everyone should have.
This isn't about perfection. It's about pure, unadulterated fun that also happens to be delicious. My monster pancake art tutorial will change your weekend breakfast game forever.
Forget sad, circular pancakes. Let's make some kitchen magic.
Remember being a kid and seeing shapes in the clouds? This is that, but edible and way more predictable.
There's a special kind of joy in watching a blob of batter transform into a grinning monster. It’s not just cooking; it's a tiny, delicious performance. Who wouldn't want to start their day with a creative win?
This process is surprisingly therapeutic, IMO. It turns a mundane meal into a core memory.
Ingredients
Gathering your supplies is half the fun. You likely have most of this in your pantry right now.
The key is thinking of the batter as your edible paint. Here’s your shopping list for culinary creativity.
- 2 cups all-purpose flour
- 2 tablespoons granulated sugar
- 1 tablespoon baking powder
- 1/2 teaspoon salt
- 2 large eggs
- 1 3/4 cups milk
- 1/4 cup melted butter, plus more for cooking
- 1 teaspoon vanilla extract
- Gel food coloring (This is non-negotiable for vibrant monsters!)
- Squeeze bottles (The real MVP of this entire operation)
Step-by-Step Instructions
- Make your master batter. Whisk all the dry ingredients together in a large bowl.
In another bowl, combine the wet ingredients. Pour the wet into the dry and stir until just combined. A few lumps are totally fine, I promise.
- Divide and color your batter.
Pour the batter into smaller bowls. This is where the magic starts. Add your gel food coloring to create your monster palette.
Think greens, purples, blues—get weird with it.
- Transfer to squeeze bottles. Carefully funnel each colored batter into its own squeeze bottle. Screw the lids on tightly.
Do a test squeeze over the sink to ensure the flow is right. You're now armed and ready.
- Sketch your monster on the griddle. Heat a non-stick griddle or pan over medium-low heat.
Lightly grease it. Now, literally draw your monster's outline with one color of batter. Work quickly before it sets.
- Fill in the details.
Switch to your other colors to fill in the body, eyes, and scary teeth. This is the fun part where it all comes to life. Layer the colors directly onto the cooking outline.
- Cook with patience.
Wait for bubbles to form on the surface of the pancake art. This takes a bit longer than regular pancakes because of the detail. Low and slow is the key here.
- The flip is an act of faith.
Carefully slide your spatula under the entire creation. Take a deep breath and flip it in one confident motion. Cook for another 1-2 minutes until golden brown.
- Serve immediately and accept your applause.
Slide your finished monster pancake art onto a plate. Admire your work for a second, then dig in. The first one is always for the cook.
Storage Instructions
Yes, you can save your monstrous creations for later.
Let the pancakes cool completely on a wire rack first. This prevents them from getting soggy. For the fridge, layer them between parchment paper in an airtight container.
They'll stay fresh for up to 3 days. For longer-term storage, the freezer is your friend. Use the same parchment paper method and freeze.
They'll be good for up to 2 months. Reheat in a toaster for the best texture.
Why You'll Love This monster pancake art tutorial
- Total Crowd-Pleaser: This is the ultimate way to win over kids, guests, or even a grumpy partner on a Saturday morning. It’s an experience, not just a meal.
- Unlocks Your Creativity: You don't need to be an artist.
The imperfect, wobbly monsters have the most character. It’s a fun, low-stakes way to be creative.
- Surprisingly Simple: Once you get the squeeze bottle technique down, it's as easy as making regular pancakes. The ingredient list is basic, and the process is a blast.
Common Mistakes to Avoid
- Using liquid food coloring.
It waters down your batter and makes pale, sad monsters. Gel coloring is a game-changer.
- Cooking on high heat. This will burn your detailed work before it's cooked through.
Patience is a virtue here.
- Overfilling the squeeze bottles. This leads to messy, uncontrolled blobs. Leave some room at the top for easy handling.
- Making the design too complex on your first try.
Start with a simple, one-color monster shape. You can level up to advanced pancake designs later.
Alternatives and Variations
This recipe is incredibly adaptable. For a gluten-free version, use a 1:1 gluten-free flour blend.
To make it vegan, swap the milk for almond milk, use a flax egg, and replace the butter with coconut oil. You can even make it protein-packed by substituting half the flour with your favorite protein pancake mix. Feel free to use whole wheat flour or add chocolate chips for the eyes.
The monster universe is your oyster.
FAQs
Can I freeze this?
Reheat from frozen in a toaster or oven for the best results.
What's the best substitute for squeeze bottles?
How long does it stay fresh?
Is this kid-friendly?
Kids go absolutely feral for these. It's a fantastic activity to do together. Let them choose the colors and design the monsters for a full-on culinary adventure.
Can I prep it ahead of time?
I don't recommend mixing the full batter or coloring it ahead of time, as the leavening agents can lose their oomph. The setup is quick once you get the hang of it.
Final Thoughts
This monster pancake art tutorial is your ticket to becoming a breakfast legend. It’s easier than it looks and ten times more fun.
Don't overthink it; just grab those squeeze bottles and make a mess. I guarantee you'll be hooked. Now go create your kitchen monsters and tag me in your photos.
I can't wait to see what you make.

From the LamyRecipes kitchen
Monster Pancake Art Tutorial
These colorful monster pancakes are part breakfast, part edible art project. With squeeze bottles and gel food coloring, you can turn your weekend mornings into a creative adventure that’s fun for kids and adults alike.
- Servings
- 4 servings
- Prep time
- 15 min
- Cook time
- 15 min
- Total time
- 30 min
Ingredients
- 2 cups all-purpose flour
- 2 tbsp granulated sugar
- 1 tbsp baking powder
- ½ tsp salt
- 2 large eggs
- 1 ¾ cups milk
- ¼ cup melted butter, plus more for cooking
- 1 tsp vanilla extract
- gel food coloring (various colors)
- squeeze bottles (for piping designs)
Instructions
In a large bowl, whisk together the flour, sugar, baking powder, and salt.
In a separate bowl, combine eggs, milk, melted butter, and vanilla extract.
Pour the wet mixture into the dry ingredients and stir until just combined. Small lumps are okay.
Divide the batter into smaller bowls and tint each portion with a different gel food coloring.
Transfer each colored batter into its own squeeze bottle. Test the flow to ensure control.
Heat a non-stick skillet or griddle over medium-low heat and lightly grease it.
Draw the monster outline using one colored batter directly onto the skillet. Work quickly before it sets.
Use other squeeze bottles to fill in eyes, body, and other monster features. Layer colors directly.
Let cook on low until bubbles appear and edges set. Carefully flip the pancake in one motion.
Cook the other side for 1–2 minutes until done. Serve immediately and enjoy!